
Hexie Zippy Pouch!
I love making this little pouch! It's so fun to fussy-cut all those hexie's and we have oodles of great fabrics for fussy-cutting!

To begin, you will need to make and stitch 24 ( one inch ) hexagons. I used a 20 centimeter zipper. It measures 7.87" from zipper stop to zipper stop and 9" from tape end to tape end. You will need to adjust your dimensions if you use a different size zipper or smaller hexagons. Changing to accomodate your zipper and hexagon size will be easy! I should note that you will be trimming the hexagon panel, so you may rather use a half hexagon on the outside edge of the panel to reduce waste. As you see, I used full 1" hexagons. If you use smaller hexagons, simply add more to the panel. You just need enough so the panel measures 8" by 6".
Once you have your 1 inch hexagon panel complete, use temporary basting spray ( I use 505 ) or your favorite basting method to baste your panel to batting and a lining fabric. Your lining fabric should be larger than the hexagon panel while quilting. Quilt the hexagon panel/quilt sandwich.

Once the quilting is finished trim the quilted hexagon sandwich so that it measures 8" wide and 6" in length. Cut a pouch back (exterior), 8" by 6". Sandwich the pouch back with batting and a lining fabric, just like with the front hexagon panel. Quilt the back of the pouch sandwich and trim to 8" by 6".

Place the quilted front of the pouch to the quilted back of the pouch, right sides facing. Match up the raw edges and pin or clip the two quilted exteriors. Using a quarter inch seam allowance, stitch along the sides of the pouch and the bottom of the pouch. Leave the top of the pouch open.

To finish off the interior seams and bind the raw edges, cut a 2.5 inch strip of fabric about 25" in length. You may cut this piece on the straight of grain, it does not need to be on the bias. Fold the 25" strip in half, wrong sides facing, along the length and press. Beginning at the top right edge, match the raw edges and bind the interior seam allowance. This is just like binding a quilt! Make sure you miter the corners and continue adding the binding to the left side of the pouch. Trim any excess binding. Wrap the binding around to the other side of the interior seam and hand stitch in place.
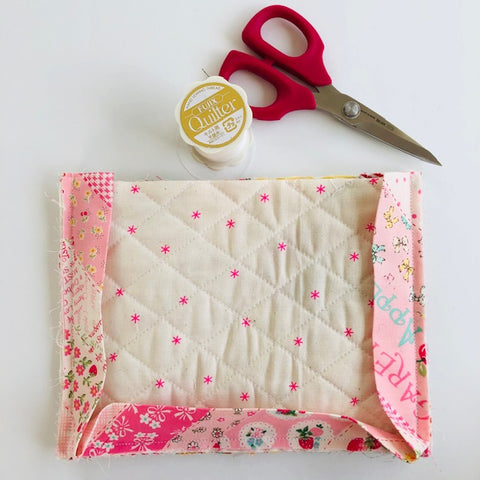
Turn your pouch right side out and gently push out the corners. Give the pouch a press.
Now you are ready to bind the top opening of your pouch. Cut another 2.5" strip of binding fabric longer than the top opening. You will need about 23" of binding. If you are using a pre-prepared binding or a binding that folds into the center, you will need to unfold it to add the binding to the top of the pouch. For the 2.5" strip binding (cut on the straight of grain), you will only need to unfold to join the ends. **You may also choose to use your favorite method for binding the top opening**
I am going to demonstrate using our pre-prepared gingham bias for the binding.
To begin, leave about 4.5" of binding unattached at the beginning. In other words you need several inches of a loose "tail" so you have enough space to join the ends. Open up the folds of the binding and matching raw edges with the raw edge of the pouch top, begin in the middle of the back exterior of the pouch. Stitch around the pouch. Your needle should fall into the crease in the binding. If you are using a binding cut on the straight of grain and folded in half, simply use a quarter inch seam allowance.

Stop stitching several inches before you come back to the starting point. Backstitch and cut your thread. You can join the ends using your favorite method. I join with a straight seam, rather than on the diagonal. With the two loose ends in hand, bring the ends to meet in the middle of the distance between the starting point and the stopping point.

Mark your binding where the two ends meet. Pin and pull the pouch away from the ends, stitch along the marked line to join the ends. Check to see that the binding fits nicely along the top of the pouch and then trim the excess binding away, leaving a 1/4 inch seam allowance.


Clip or pin the open binding to the top of the pouch and beginning where you stopped, continue stitching the binding to meet the starting point. Backstitch. Now the binding is attached to the exterior of the pouch.
**You can also pin to fit the binding around the top, without sewing. Mark where the ends will join, remove the pinned binding from the top of the pouch, and finish the binding "loop". Next re-pin the binding "loop" to the top of the pouch and sew the binding to the top.
Turn the pouch so it is, again, inside out and wrap the top binding around to the interior and hand stitch in place.
Still with your pouch interior side out, grab your zipper and arrange it so the top of the zipper is near one side pouch seam (mine is about 1/4" away from the seam). Zipper teeth sould be pointed toward the top edge of the pouch. Start clipping the zipper to one side of the pouch (front or back). Remember you are working with the lining side facing out toward you. And be sure the zipper is oriented correctly. You are working on the wrong side of the zipper. I always check this to make sure I am not sewing the zipper in upside down! Before you begin stitching, fold the top tape section (before the top zipper stop) under so it is out of the way.

With needle and thread, hand stitch the zipper to one side of the pouch. First stitch about in the middle of the tape. You will see a different weave on the tape about 1/4 inch down from the teeth. This is the area to stitch. I simply use a short running stitch. You may want to backstitch every few stitches.


Stop stitching before you reach the other side seam on the pouch. You want to stop and stitch in place several times about 1/4 inch from the side seam.
Next stitch again at the bottom edge of the tape. This is just to keep the zipper tape in place.

Repeat this on the other side of the pouch, making sure your zipper is tracking correctly. Leave a 1/4 inch open at the closed end of the zipper. There will be a 1/2 inch area at the closed end unstitched (a quarter inch on both sides of the side seam area, where the closed end of the zipper rests). The tail of the zipper (closed end of the zipper) might be exposed to the exterior, gently push it through the 1/2 inch opening. This will hide the closed zipper end on the interior of the pouch.


Once again, turn your pouch right side out. Gently push out the corners and give the pouch a press. That's it! A sweet little hexie pouch to keep or to gift!
Happy Stitching! Mary and Shawn - The Sunny Gals
