
The Vintage Flower Sampler Quilt - Around the World and Rose
It is Week 6 and that means we are halfway through! Yay! Our blocks today are the patchwork block, Around the World. And the applique block is Rose.


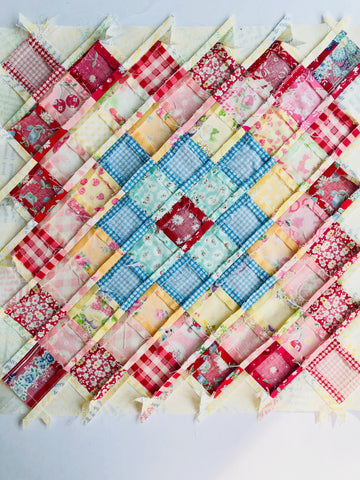
Around the World -

Around the World is a familiar traditional block. You may know it as, Trip Around the World. There are lots of seams in this block, so it is imperative to use and accurate and consistent 1/4 inch seam allowance.
We will begin this block by preparing template A. I used Quilters Template Plastic to make my A template. You may choose to measure and cut your A pieces with a rotary and an acrylic ruler. Be very sure to measure and cut accurately.
As you sew the squares into rows, press the seams in the rows open. I also chose to starch each row to help keep them crisp and straight. Line up your rows in front of you in the proper order.

Once all your rows are finished, add the B triangles to all the rows except the middle or longest row. Take care to add the triangles properly. The long bias edge will face left on all the rows left of the middle row. And they will face the right on all the rows to the right. Refer to the diagram in the book for proper placement. Again, press all seams open.
Now it's time to sew the rows together. I work from the center and add rows to each side. Pin where the seams meet before sewing. Using a 1/4 inch seam allowance, sew right up to the pin and carefully remove before sewing over the pin.

If your seams don't meet up quite properly, take out a few stitches an inch before and after the seam. Reposition the seam and pin again. Gently ease in any fullness without shifting the seam. Press all seams open.
The back of your block will look a bit wild with the extra bits from the triangles added to the top and the bottom of each row. Carefully,trim the extra triangle ends even with your seams.
Using a square up ruler or your acrylic ruler and mat, trim the block to 12.5". Be sure that you have 1/4 inch seam allowance beyond the points on each side.
Rose-

The Rose block is the last of the flower blocks! The stems and leaves are similar to the other flower blocks from prior weeks. The most challenging parts of the Rose block are the scalloped flower and the very small circles!
I printed my templates at 100% with my home printer and CutRite Heavy Duty Freezer Paper. Once I cut the large rose template, I made 4 large rose shapes. Of course, I am using the starch method on this quilt. I found it easier to clip in the "v" or dips in the rose shape and starching/pressing those sections first. Then once the dips are in place, I painted the curves with starch and pressed those into place.


You may want to add a dab of Fray Check in the area where you clipped before you applique. And when you applique this area to the background, take a few very small stitches in the "v" area using a thread that matches the shape.

Once your large rose shapes are complete, you can use this same template to make the 4 smaller scallop rose shapes to layer on the larger one.
The smallest circles are a little more challenging. I found it easiest to cut the small circle from the template printed on CutRite Heavy Duty Freezer Paper. You could also use a circle punch that is similar in size. Because this circle is so small, I found I had better results if I left a small seam allowance to paint and press to the wrong side of the template. Pop out the freezer paper template once your shapes are pressed and cool. Never leave the template in the shape as you applique. These tiny circles are a challenge, but take your time and, I believe, you will be successful!
Keep up the good work!
Don't forget to add the hashtag #thevintageflowersamplerquiltsal - we have more fun giveaways planned! See you next week!