
The Vintage Flower Sampler Quilt - Pineapple and Tulips
Welcome back! Its Week 5 of The Vintage Flower Sampler Quilt Sew Along!
This week we are working on the Pineapple Block and the Tulips Block!


Pineapple Block

Our patchwork block this week is the Pineapple Block. The Pineapple Block is a variation of a Log Cabin Block. During colonial times the pineapple was the symbol of hospitality. The Pineapple Block can be dated back to the mid-1880's. Instead of 2 light and 2 dark strips as in the log cabin or courthouse steps blocks, the pineapple block consists of 4 light and 4 dark strips wrapped around a center. Since the strips are added on the diagonal it gives this block the spiky appearance similar to a pineapple.
This week is the first week we are directed to cut pieces using the patchwork templates in the book. Take special note of the light and dark fabrics you are cutting from the templates. C, E, G, I and J are the darks. And B, D, F and H are cut from the light fabrics.

Last week, on Instagram, we talked about transferring the templates from the book to a useable form for your sewing. There are many ways to make templates! You might simply copy them using your printer, or you may want to make more substantial templates using cardboard, quilters template plastic or the CutRite Heavy Duty freezer paper. I usually copy templates by tracing the shape onto the paper side of regular Reynolds Freezer paper. Using a light box and a fine permanent marker, I carefully trace my pattern. However, you may want to cut your freezer paper to letter paper size and feed it through your printer. If you use regular freezer paper or CutRite Heavy Duty Freezer Paper, its easy to cut the fabric shape out using your acrylic ruler and a rotary cutter. Please, look back at our Instagram post from July 13th. for more ideas!
The Pineapple Block begins by cutting a center square and triangles to add to each side, very much like an economy block. As you work through this block, finger press a crease in the center of all the triangles or strips to match the center with the center of the strip below it.
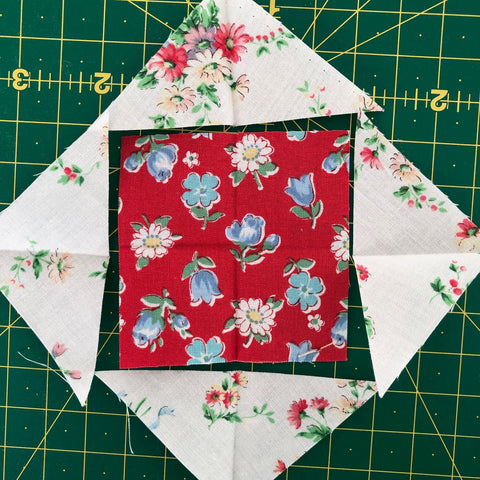
And always add strips or triangles to opposite sides of the center. Press seam allowances away from the center.

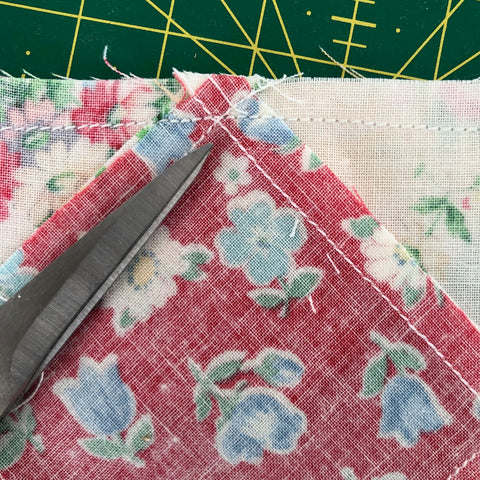
**NOTE- If you are using the templates from the book to piece your block, once you reach strip D, your strips will no longer overlap when added around the center.

Remember that when piecing with triangles, take care not to stretch your fabric as you feed it through the machine. And I like to sew with the piece I am adding underneath, as I feed it through. This may seem counterintuitive, but I want to be sure that I am preserving my points. I want my needle to hit that intersection of seams to preserve my point.
Continue to add strips, alternating light and dark as represented in the book. Press all seams away from the center square.

When finished, trim up your block to 12.5" square.
Tulips Block

Well, the Tulips block is one of my favorites. I absolutely love the oval segments! They are reminiscent of a Pennsylvania Dutch motif.
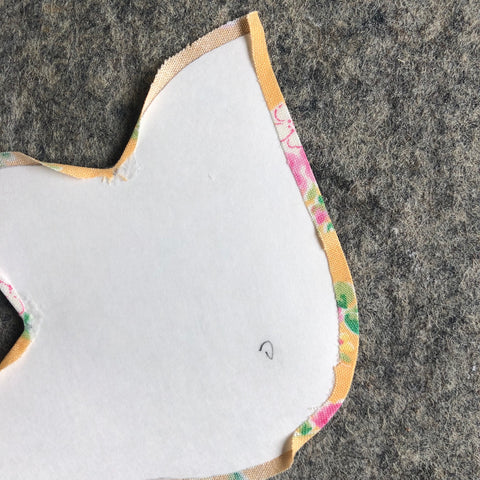
I think it's important to reiterate how crucial it is to trace and cut your templates neatly so that you have a smooth tidy template. Beginning with a good template is half the battle! One way to start with a perfect template is to feed your CutRite Heavy Duty Freezer Paper through your printer. Be sure to print at 100%. If you are tracing by hand try to use long smooth strokes in tracing. Take your time.

Another area to focus on is how you cut out the template. First use small sharp scissors. Choose the appropriate size scissors for the job at hand. And then, again, cut in long smooth cuts rather than sawing your way through the template. Lastly, if you have an area with a "dip", cut from one side of the "dip".

And then come back from the other side to complete the cut.

This gives you a much cleaner cut than if you try to clip in that dip and then pivot.
In this block, the stems and leaves are similar to past blocks. The base of the tulip has two semi-circular sections peeking out from behind the center of the tulip. I traced this shape on my CutRite Heavy Duty Freezer Paper as it appears on the template. I pressed this shape to the wrong side of my fabric and cut out leaving a scant 1/4" seam allowance. When painting the seam allowances with starch, I left the bottom section unturned and raw. The bottom section will be covered by the body of the tulip, so it does not need to be finished. Be sure that you are leaving a small seam allowance to wrap around the shape. If your seam allowance is small and neatly cut, it's easier to get a smooth wrap without any folds. If you do get a fold, simply pull that area away from the template, add a touch of starch and press again. Go slow and paint and press a small section at a time. Once you have finished a shape, give it another press with your iron and when it has cooled, pop out the CutRite Heavy Duty Freezer Paper or your layered regular freezer paper. Do not leave the paper in the applique.

As you prepare the body of the tulip, you will need to clip in the "V" sections where the petals flare. Clip into the seam allowance, close to the line for turning under. When you applique sharp corners, take several small stitches in these areas to secure and keep it from fraying. You may want to add a small dab of fray check in any point or sharp corner. I like to paint this area with my starch first and press it in place. Then I go back to a long smooth area of the shape and start painting and folding.


The small oval sections that are layered on top of the tulip are a bit fussy, but Oh So Cute when layered on top of the body of the tulip!
Take your time and gently turn the curve with your needle or fold over if you are using the starch method. Again, I would recommend leaving a very small seam allowance around the small curves on both ends of the ovals. I found it easier to paint and press the curved ends first and then went back to the long straight edges.


Once you have all your pieces prepped, begin with the pieces that are on the bottom (underneath other pieces) and baste using your favorite method. I like to use Roxanne's Glue Baste-It or even white Elmers school glue. When I began quilting, years before glue basting, we used small applique pins. Applique pins work because they are small enough to hold without causing injury. But I found the glue baste-it or even thread basting holds the shape in place better and my hands aren't pricked with the pins.
Of course, match your applique thread to your applique shape! Take your time and enjoy the process!
Be sure to post your process photos to Instagram and use the hashtag
#thevintageflowersamplerquiltsal